A Cron Job can be visualized as a scheduled task manager. It is sort of a command which is scheduled to get executed at a predefined time-frame. These commands are stored in a Unix configuration file known as Crontab.
Cron Jobs allow users to run predefined commands at any allotted point of time in future. Usually, Cron Jobs are configured for performing tasks/events which are recurring in nature. One can configure a Cron Job and schedule it for running at a desirable interval and the system will keep on executing the command at the specified timings without any manual intervention/reminder. cPanel’s Cron Job feature can be used to execute any Unix command. You can also automate the execution of your PHP Scripts by configuring a Cron Job.
Here goes a detailed tutorial on the complete lifecycle of a Cron Job right from its creation to removal.
Step 1: Log in to cPanel & Locate Cron Jobs Icon
Log in to cPanel using the credentials provided by your hosting partner. Cron Jobs icon can be located towards the bottom of your cPanel Home page under “Advanced” section.
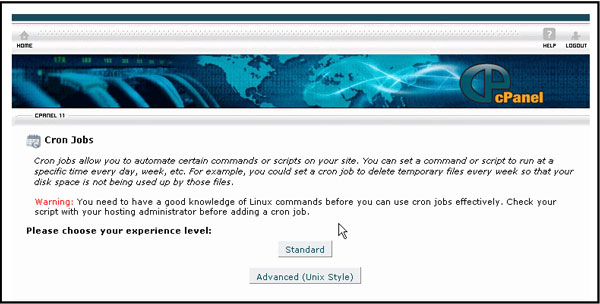
Step 2: Selecting the Mode – Standard or Advanced
Depending upon the level of expertise, Cron Jobs can be configured in 2 ways – Standard & Advanced. Select your preferred mode.
Step 3: Configuring Standard Cron Jobs
The first option that you will encounter in Standard tab is whether or not you would like to receive e-mail notification whenever a cron job gets executed. Provide your email address at the corresponding input box to receive the notification, leave it blank otherwise.
In the subsequent input boxes, you are required to provide the information related to the task as given below –
1. Command – Provide the command that you are looking to execute. For example, to remove the temporary files, you may run the command – “set dir=~/tmp/vim-swap-files//,/var/tmp//“.
2. Schedule– Specify the timing(s) at which you would like the Cron Job to get executed. You can specify Minute(s)/Hour(s)/Month(s)/Day(s)/Weekday(s) from the drop-down list and click on “Create/Add New Cron Job” button.
For example, if you want a certain command to be executed at 12:30 pm on a daily basis, you would need to select the following values from the drop-down menu – Minute(s) – 30 Hour(s) – 12 Day(s) – Every Day Month(s) – Every Month Weekday(s) – Every Weekday.
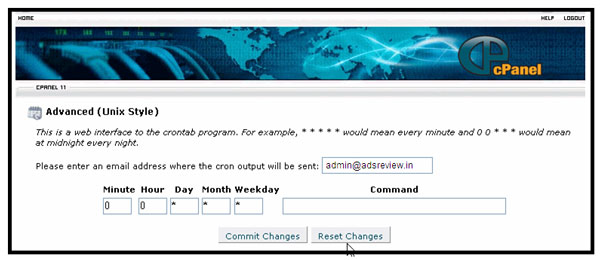
Step 4: Configuring Advanced Cron Jobs
While creating a Standard Cron Job, you get the option to select the timing values from a drop-down list. However, in Advanced mode, you have the luxury to input any required value as desired in the designated input boxes as can be seen in the below screenshot. If we visualize Standard Cron Job configuration as a Windows style operation (usage of drop down lists), then the Advanced mode can be considered as its Unix equivalent.
Don’t forget to type the email address and the command to execute, before clicking on the ‘Commit Changes’ button. A confirmation message will get displayed once you have successfully created the Cron Job.
Step 5: Deleting a Cron Job
Click on the Cron Jobs icon on your cPanel Home and look for “Current Cron Job” table. Simply click on the “Delete” button (listed under “Actions” column) corresponding to the desired row to remove it.


")


